SIST ISO 3547-2:2008
Plain bearings - Wrapped bushes - Part 2: Test data for outside and inside diameters
Plain bearings - Wrapped bushes - Part 2: Test data for outside and inside diameters
ISO 3547-2:2006 specifies the test data for outside and inside diameters of wrapped bushes made of solid and multi-layer bearing material for plain bearing applications. It also specifies test designations.
Gleitlager - Gerollte Buchsen - Teil 2: Prüfangaben für Außen- und Innendurchmesser
Paliers lisses - Bagues roulées - Partie 2: Données d'essai pour le diamètre extérieur et le diamètre intérieur
Drsni ležaji - Zvite puše - 2. del: Podatki za preskus zunanjega in notranjega premera
General Information
Relations
Standards Content (Sample)
2003-01.Slovenski inštitut za standardizacijo. Razmnoževanje celote ali delov tega standarda ni dovoljeno.Plain bearings - Wrapped bushes - Part 2: Test data for outside and inside diametersDrsni ležaji - Zvite puše - 2. del: Podatki za preskus zunanjega in notranjega premeraPaliers lisses - Bagues roulées - Partie 2: Données d'essai pour le diamètre extérieur et le diamètre intérieurGleitlager - Gerollte Buchsen - Teil 2: Prüfangaben für Außen- und Innendurchmesser21.100.10Drsni ležajiPlain bearingsICS:SIST ISO 3547-2:2008enTa slovenski standard je istoveten z:ISO 3547-2:200601-julij-2008SIST ISO 3547-2:2008SLOVENSKI
STANDARDSIST ISO 3547-2:20021DGRPHãþD
Reference numberISO 3547-2:2006(E)© ISO 2006
INTERNATIONAL STANDARD ISO3547-2Second edition2006-10-15Plain bearings — Wrapped bushes — Part 2: Test data for outside and inside diameters Paliers lisses — Bagues roulées — Partie 2: Données d'essai pour le diamètre extérieur et le diamètre intérieur
©
ISO 2006 All rights reserved. Unless otherwise specified, no part of this publication may be reproduced or utilized in any form or by any means, electronic or mechanical, including photocopying and microfilm, without permission in writing from either ISO at the address below or ISO's member body in the country of the requester. ISO copyright office Case postale 56 • CH-1211 Geneva 20 Tel.
+ 41 22 749 01 11 Fax
+ 41 22 749 09 47 E-mail
copyright@iso.org Web
www.iso.org Published in Switzerland
ii © ISO 2006 – All rights reserved
INTERNATIONAL STANDARD ISO 3547-2:2006(E) © ISO 2006 – All rights reserved 1Plain bearings — Wrapped bushes — Part 2: Test data for outside and inside diameters 1 Scope This part of ISO 3547 specifies the test data for outside and inside diameters of wrapped bushes made of solid and multi-layer bearing material for plain bearing applications. It also specifies test designations. Since the wall thickness of the bush is measured in the free condition, no special test data is required for this on the drawing (see ISO 3547-5 and ISO 3547-6). NOTE Depending on the manufacturing method, the back of the bushes can show isolated light depressions and, similarly, bushes with lubrication holes, grooves and bore indentations can show distortion. The wall thickness must therefore be measured away from these areas. 2 Normative references The following referenced documents are indispensable for the application of this document. For dated references, only the edition cited applies. For undated references, the latest edition of the referenced document (including any amendments) applies. ISO 3547-1:2006, Plain bearings — Wrapped bushes — Part 1: Dimensions ISO 3547-4:2006, Plain bearings — Wrapped bushes — Part 4: Materials ISO 4378-1, Plain bearings — Terms, definitions and classification — Part 1: Design, bearing materials and their properties ISO 12301, Plain bearings — Quality control techniques and inspection of geometrical and material quality characteristics ISO 13715, Technical drawings — Edges of undefined shape — Vocabulary and indication 3 Terms and definitions For the purposes of this document, the terms and definitions given in ISO 4378-1 apply.
...
INTERNATIONAL ISO
STANDARD 3547-2
Second edition
2006-10-15
Plain bearings — Wrapped bushes —
Part 2:
Test data for outside and inside
diameters
Paliers lisses — Bagues roulées —
Partie 2: Données d'essai pour le diamètre extérieur et le diamètre
intérieur
Reference number
©
ISO 2006
PDF disclaimer
This PDF file may contain embedded typefaces. In accordance with Adobe's licensing policy, this file may be printed or viewed but
shall not be edited unless the typefaces which are embedded are licensed to and installed on the computer performing the editing. In
downloading this file, parties accept therein the responsibility of not infringing Adobe's licensing policy. The ISO Central Secretariat
accepts no liability in this area.
Adobe is a trademark of Adobe Systems Incorporated.
Details of the software products used to create this PDF file can be found in the General Info relative to the file; the PDF-creation
parameters were optimized for printing. Every care has been taken to ensure that the file is suitable for use by ISO member bodies. In
the unlikely event that a problem relating to it is found, please inform the Central Secretariat at the address given below.
© ISO 2006
All rights reserved. Unless otherwise specified, no part of this publication may be reproduced or utilized in any form or by any means,
electronic or mechanical, including photocopying and microfilm, without permission in writing from either ISO at the address below or
ISO's member body in the country of the requester.
ISO copyright office
Case postale 56 • CH-1211 Geneva 20
Tel. + 41 22 749 01 11
Fax + 41 22 749 09 47
E-mail copyright@iso.org
Web www.iso.org
Published in Switzerland
ii © ISO 2006 – All rights reserved
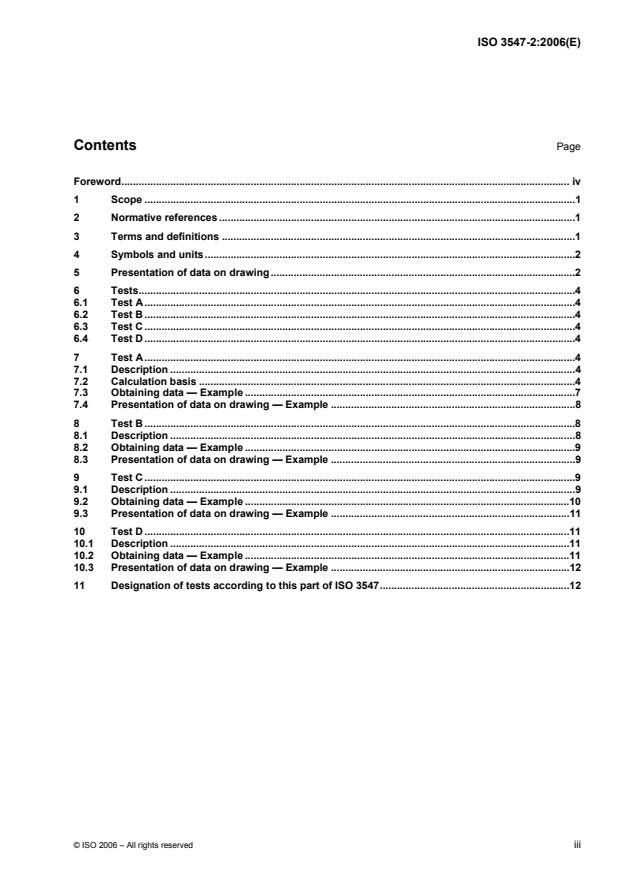
Contents Page
Foreword. iv
1 Scope .1
2 Normative references .1
3 Terms and definitions .1
4 Symbols and units.2
5 Presentation of data on drawing.2
6 Tests.4
6.1 Test A.4
6.2 Test B .4
6.3 Test C .4
6.4 Test D .4
7 Test A.4
7.1 Description .4
7.2 Calculation basis .4
7.3 Obtaining data — Example .7
7.4 Presentation of data on drawing — Example .8
8 Test B .8
8.1 Description .8
8.2 Obtaining data — Example .9
8.3 Presentation of data on drawing — Example .9
9 Test C .9
9.1 Description .9
9.2 Obtaining data — Example .10
9.3 Presentation of data on drawing — Example .11
10 Test D .11
10.1 Description .11
10.2 Obtaining data — Example .11
10.3 Presentation of data on drawing — Example .12
11 Designation of tests according to this part of ISO 3547.12
Foreword
ISO (the International Organization for Standardization) is a worldwide federation of national standards bodies
(ISO member bodies). The work of preparing International Standards is normally carried out through ISO
technical committees. Each member body interested in a subject for which a technical committee has been
established has the right to be represented on that committee. International organizations, governmental and
non-governmental, in liaison with ISO, also take part in the work. ISO collaborates closely with the
International Electrotechnical Commission (IEC) on all matters of electrotechnical standardization.
International Standards are drafted in accordance with the rules given in the ISO/IEC Directives, Part 2.
The main task of technical committees is to prepare International Standards. Draft International Standards
adopted by the technical committees are circulated to the member bodies for voting. Publication as an
International Standard requires approval by at least 75 % of the member bodies casting a vote.
Attention is drawn to the possibility that some of the elements of this document may be the subject of patent
rights. ISO shall not be held responsible for identifying any or all such patent rights.
ISO 3547-2 was prepared by Technical Committee ISO/TC 123, Plain bearings, Subcommittee SC 3,
Dimensions, tolerances and construction details.
This second edition cancels and replaces the first edition (ISO 3547-2:1999), which has been technically
revised.
ISO 3547 consists of the following parts, under the general title Plain bearings — Wrapped bushes:
⎯ Part 1: Dimensions
⎯ Part 2: Test data for outside and inside diameters
⎯ Part 3: Lubrication holes, grooves and indentations
⎯ Part 4: Materials
The following parts are under preparation:
⎯ Part 5: Checking the outside diameter
⎯ Part 6: Checking the inside diameter
⎯ Part 7: Measurement of wall thickness of thin-walled half-bearings and thin-walled bushes
iv © ISO 2006 – All rights reserved
INTERNATIONAL STANDARD ISO 3547-2:2006(E)
Plain bearings — Wrapped bushes —
Part 2:
Test data for outside and inside diameters
1 Scope
This part of ISO 3547 specifies the test data for outside and inside diameters of wrapped bushes made of
solid and multi-layer bearing material for plain bearing applications. It also specifies test designations.
Since the wall thickness of the bush is measured in the free condition, no special test data is required for this
on the drawing (see ISO 3547-5 and ISO 3547-6).
NOTE Depending on the manufacturing method, the back of the bushes can show isolated light depressions and,
similarly, bushes with lubrication holes, grooves and bore indentations can show distortion. The wall thickness must
therefore be measured away from these areas.
2 Normative references
The following referenced documents are indispensable for the application of this document. For dated
references, only the edition cited applies. For undated references, the latest edition of the referenced
document (including any amendments) applies.
ISO 3547-1:2006, Plain bearings — Wrapped bushes — Part 1: Dimensions
ISO 3547-4:2006, Plain bearings — Wrapped bushes — Part 4: Materials
ISO 4378-1, Plain bearings — Terms, definitions and classification — Part 1: Design, bearing materials and
their properties
ISO 12301, Plain bearings — Quality control techniques and inspection of geometrical and material quality
characteristics
ISO 13715, Technical drawings — Edges of undefined shape — Vocabulary and indication
3 Terms and definitions
For the purposes of this document, the terms and definitions given in ISO 4378-1 apply.
4 Symbols and units
See Table 1.
Table 1 — Symbols and units
Symbol Description Unit
A
Reduced area of cross section (calculated value) of the bush mm
cal
B Width of the bush mm
C
Inside chamfer mm
i
C
Outside chamfer mm
o
D
Flange diameter mm
fl
D
Housing bore diameter mm
H
D
Inside diameter of the bush mm
i
D
Inside diameter of the bush in the ring gauge mm
i, ch
D
Outside diameter of the bush mm
o
F
Checking load mm
ch
d
Diameter of the checking block or ring gauge mm
ch, 1
d
Diameter of the setting plug or plug gauge mm
ch, 2
r
Flange radius mm
a
s
mm
Thickness of the backing layer
a
s
Thickness of the bearing material layer mm
a
s
mm
Wall thickness
s
Flange thickness mm
fl
Tolerance of D
∆D
mm
o
o
Elastic reduction of the outside diameter under checking load F
v mm
ch
z Distance apart of the halves of the checking block mm
Indicator reading mm
∆z
∆z
Circumference indicator reading for test D mm
D
a
For bushes which are made of a single material, s = s or s = s .
1 3 2 3
5 Presentation of data on drawing
The drawing should show either
⎯ the outside diameter, D , and the wall thickness, s , or
o 3
⎯ the outside diameter, D , and the inside diameter, D .
o i
Wall thickness, s , and inside diameter, D , shall not be specified together on the same drawing.
3 i
See Figure 1.
2 © ISO 2006 – All rights reserved
Dimensions in millimetres
Type C cylindrical bush
Type F flanged bush
Key
1 split
a
Thickness of the bearing material layer: only valid as a basis for calculation in accordance with 7.2.
b
C may be a chamfer or break edge, in accordance with ISO 13715.
i
c
0,2 mm min. for nominal wall thickness 0,5 mm.
d
r = s .
max 3
Figure 1 — Cylindrical and flanged bush
6 Tests
6.1 Test A
Check the outside diameter, D , using a checking block in a test rig and setting plug, in accordance with
o
Clause 7.
6.2 Test B
Check the outside diameter, D , using two ring gauges, in accordance with Clause 8.
o
6.3 Test C
Check the inside diameter, D , of a bush pressed into a ring gauge, in accordance with Clause 9.
i
6.4 Test D
Check the outside diameter, D , using precision measuring tape, in accordance with Clause 10.
o
7 Test A
7.1 Description
This test is applicable to 2D up to 180 mm.
o
The test rig consists of a base on which the two parts of the checking block are mounted (see ISO 3547-5).
A setting plug is inserted in the checking block and the two halves of the checking block are pressed towards
one another using the given checking load, F , and the indicator reading set.
ch
The setting plug is then removed and replaced by the bush to be checked, and the checking load reapplied.
After the bush has been inserted, the distance, z, between the two halves of the checking block changes
under checking load F and the distance indicator reading, ∆z, is recorded.
ch
From this, D can be calculated.
o
Flanged bushes may be checked either before or after flange forming at the option of the manufacturer.
7.2 Calculation basis
7.2.1 Elastic reduction, v, of outside diameter, D
o
The elastic reduction, v, of the outside diameter, D , is the difference between D under zero load and the
o o
resultant diameter when the checking load, F , is applied. Force F shall be sufficient to ensure that the
ch ch
bush conforms properly to the surface of the test housing and that the results in the elastic reduction, v, of the
outside diameter are in accordance with Table 2.
4 © ISO 2006 – All rights reserved
Table 2 — Elastic reduction, v, of the outside diameter, D ,
o
under checking load, F
ch
Dimensions in millimetres
D
o
v
nominal
u 6 0,003
u 12 0,006
> 6
u 80 0,013
> 12
0,025
u 180
> 80
7.2.2 Calculation of diameter of checking block, d
ch, 1
The diameter of the checking block can be calculated from the specified upper limit of the outside diameter,
D , of the bush from the equation:
o, max
dD=−v
ch,1 o, max
7.2.3 Effective cross-sectional area, A
cal
In order to calculate the checking load, F , the effective cross-sectional area, A , of the bush shall first be
ch cal
determined.
A depends on the material type, bush width B, s and s . See Table 3.
cal 1 2
Table 3 — Nominal dimensions for wall thickness, s , backing material, s , and bearing layer, s
3 1 2
Dimensions in mill
...


Questions, Comments and Discussion
Ask us and Technical Secretary will try to provide an answer. You can facilitate discussion about the standard in here.